Brown Indian Paisley Silk Top – A Story of Failure and Redemption

Hey friends!

Let me tell you a story. It is a timeless tale of pride and humility, of lessons learned and sadness mended. Be warned, this story is not for the faint of heart – it is heavy with treasure, peril, sorrow, and redemption. 

Once there was a princess who loved to travel, who dreamed of seeing the far corners of the earth. This princess had loved India most particularly since she was a little girl, but alas – she had never had the means nor opportunity to travel there. One of her dearest friends, however, traveled to that exquisite land and brought her back a magical and wondrous gift – silk fabric in a brown paisley print that was soft and luxurious to the touch. 

Please excuse the tired eyes of the princess. 

The princess delighted in this gift, and stored it carefully away until the time was right to put this precious gift to use. In the meantime, the princess grew in her magical powers and in her training. She became overconfident, and decided that she no longer needed her trusty helpers – Pattern, Tape Measure, and Pins – and decided to concoct her spells on her own. And what better way to showcase her carefree and effortless talent to the world than by using this treasure gift from months before? She eagerly dove into the project. 

But something went terribly wrong. The fabric, once so sumptuous and decadent to the touch, turned slippery and fickle. Without her trusty helpers to guide her in taming the fabric, it became wild and rebellious. The princess whittled away at her precious gift until there was almost nothing left, and she turned away from the project bitterly in defeat, tears sparkling in her eyes. 

Months passed. Nothing could dull the shame of the princess’ overzealous pride, but finally, she turned once again to her trusted friends – Pattern, Tape Measure, and Pins – asking for their help. In kindness, they eagerly agreed to help and the magical project once so destitute was salvaged into something recognizable through the humble work of the princess and the powerful, mystical work of her friends. Having learned her lesson, the princess never made the same mistake again. 

Or at least, that’s how I’m hoping the story ends. Spoiler alert – I’m the princess in the story. After receiving that gorgeous paisley silk, I cut into it hoping to find a garment along the way, thinking that I was now ‘advanced’ enough to just cut into fabric without a plan. Well let me tell you, it does not work that way. Luckily, I learned my lesson in enough time to save the little bit I had left and make a lovely, flowy top out of it. I used my serger to even out the seams and the raw edges, which helped a lot to make the hems lie flat. Yay sergers!

I wore this out to dinner recently with my boyfriend, and really loved how it turned out. Especially in the heat we’ve been having this summer – ooof! It’s nice to have something loose and forgiving. The hemline is even, I swear! It was fairly breezy when we were taking pictures, so it looks uneven in pictures. 

Moral of the story – don’t ever think you’ve stopped learning. You probably haven’t, and likely never will. Have a great weekend, friends!

Finished Project: Organic Black Bamboo Knit Dress

Hey friends, 

Got a quick finished project for you today. I’ve been feeling real under-the-weather with one of those crazy stomach bugs (which is the absolute worst in the summer, I might add), so blogging about a simple project is right up my alley today. 

This dress is one of my favorite summer dresses. It’s made from an organic bamboo jersey knit from Mood that I bought during their Earth Week sale last year. I didn’t buy a lot of it because, you know, student debt problems, so I wasn’t sure initially what I wanted to do with it, and finally decided a simple dress would do. 

Le close-up. 
Le close-up. 

Fun fact: historically bamboo was only used for things like the ribs of corsets and bustles because of it’s structure, advances in technology mean we can use it for a whole range of things – like swooshy knit dresses. Bamboo can be a great source of textiles for a few ecological reasons:

  1.  It’s one of the fastest growing members of the grass family in the world (it can reach up to 35 meters and one Japanese species grows up to 1 meter per day).  
  2. Since it is a member of the grass family, it grows back after being cut, like mowing the lawn. This also slows deforestation and sequesters much more carbon dioxide than a young growth forest. 
  3. Bamboo is biodegradable, uses very little water (bamboo is twice as water-efficient as a tree), and reduces soil erosion where it is planted. 

So, I was of course more than happy to support this kind of material from a major fabric distributor like Mood. 

Aside from it’s environmentally conscious properties, this fabric is sooooo soft and swooshy. The actual making of the dress took about hour, from cutting to finish, since a) it’s such a simple pattern and b) because it’s a knit I didn’t have to worry about finishing the hem since it won’t unravel. The pattern is a kimono sleeve top that I drew up years ago that I simply lengthened into a dress. I added the elastic waist, since the weight of the jersey needed a little extra support for the skirt. 

On this particular day, I wore the dress out on a Sunday brunch date with the boyfriend. Keeping it simple, as is the theme for the blog post. And there you have it! An environmentally conscious dress that was made with love (trying not to get sappy here, y’all). I’m off to drink more gingerale and drink some chicken soup. Have a lovely week, friends!

My sunglasses here are also made out of bamboo, btw ;-) 
My sunglasses here are also made out of bamboo, btw 😉 

Going #plasticfree in July

Hey friends!

Today’s post is on #plasticfreejuly – the trend taking the nation by storm. What’s that, you say? What does that hashtag even mean? Well, I’m so glad you asked!

Plastic shopping bags”/> Cloth shopping bags > Plastic shopping bags

#Plasticfreejuly is a challenge to give up using plastic for the month of July. Sounds pretty basic, right? That’s what I thought until I started making a mental inventory of all the ways I’ve used plastic everyday. It’s in toothbrushes, hairbrushes, garbage bags, lunch bags, produce and grocery bags. We use plastic baggies for snacks, for sandwiches, and for cleaning the cat litter box. Plastic beads are in the bodyscrubs we buy and plastic additives are in microwavable meals for texture and durability. I could go on and on here, but I think you get the point. It’s literally everywhere. 

Photo Cred:  Ars Electronica

It’s so pervasive, in fact, that it’s clogging up our oceans, our landfills, and is even orbiting the planet as we speak. 

All the plastic in the ocean is particularly bothersome to me. As a kid, I remember my grandfather meticulously and relentlessly cutting up plastic six pack soda pop rings, and thinking it was a little extreme. Now, I know that he was right. Americans have an obsession with plastic. Since the 1950’s, our annual plastic consumption has skyrocketed from 5.5 million tonnes to 110 million tonnes in 2009. And a large portion of that ends up in the ocean. 

Photo Cred: National Geographic

So, in light of this harsh reality, the movement to go plastic-free really appeals to me. This is something I’ve been working towards for a while and I’m not fully there yet. But every little bit counts. And what I love about this movement is it’s encouraging nature. We all live in a world obsessed with disposability, so at some level, we’re all complicit in the system. But the way to fight the carelessness of the system is not to shame or judge each other, but rather encourage and support each other in the pursuit of cleaner, better living. In that spirit, here are my two biggest accomplishments in plastic-free living:

1. My bamboo toothbrush. I really love this thing. It’s biodegradable, plastic-free, and does a great job cleaning my teeth (cuz good dental health is super important). I found mine here but there are a lot of great options out there. (PS I wrote a little about the awesome-ness of bamboo as used in textiles here.)

Just chillin' with my deodorant stone...
Just chillin’ with my deodorant stone…

2. My bamboo sunglasses. Seriously, love these things. They are durable and chic and really comfortable. Got mine here

Relaxing with brunch. 

3. My cloth shopping bags. These are soo helpful – they’re washable, durable, and have a long, long life ahead of them. Plus I love the patterns :-). I have some of these in my shop, so feel free to check them out. 

We all need some encouragement to do better in this world, so know that wherever you are and whatever your efforts, I think it’s great and you’re great for trying. Have a great weekend, friends!

Finished Project: White and Blue Striped Pattern Runway Sundress

Hey friends!

Happy post holiday weekend! Even though it’s technically a shorter week, the days feel soooo looooong. I hope everyone had a lovely and relaxing long weekend, but I hear ya. Post-celebratory days are hard. 

Which is why I’m here, with another fun-filled finished project! I hope the beauty and style, grace and poise, exuded in this picture will help you sail through the rest of the week:

Umm...wooow. 
Umm…wooow. 

Today’s project is a classic TNT (tried ‘n true) sewing pattern for me. This is actually my second make of the actual pattern (I will be blogging about that soon), but I’ve used the top countless times and drafted my own skirt to go with it (here’s a good example). 

I. Love. This. Dress. This pattern is one of those it-has-everything-I-want-in-a-dress kinda patterns. Pockets. Flattering neckline. Pockets. Comfy skirt. POCKETS. Such a fun dress for hot summer days.

The pattern is the Gathered Sundress from Pattern Runway. I found it years ago when I first started sewing and just fell in love with it. This is my best attempt to shamelessly copy the model’s pose. When I saw this fabric, I knew it would make into the perfect copy-cat dress. 

Please note the epic stripe matching happening on the waist:

There are some fit issues on the bodice – I should take half an inch out of the back pieces, and maybe a quarter-inch out of the front pieces, to take away some of the excess drag and fabric. But that’s not too noticeable (I hope) and I can work that out for the next time I make a dress from this pattern. Because let’s be honest. I’M GOING TO MAKE THIS PATTERN AGAIN. 

I wore it to a family barbecue on the 4th and then out to see the fire works over Lake Michigan in the evening. I have mixed feelings about celebrating Independence Day – a day that brought freedom for a select few, and left many, many more fighting for freedom up until this very day. But I do love fireworks and I do love family, so I can support those things. 

Have a wonderful week, friends! 

Obligatory fireworks photo

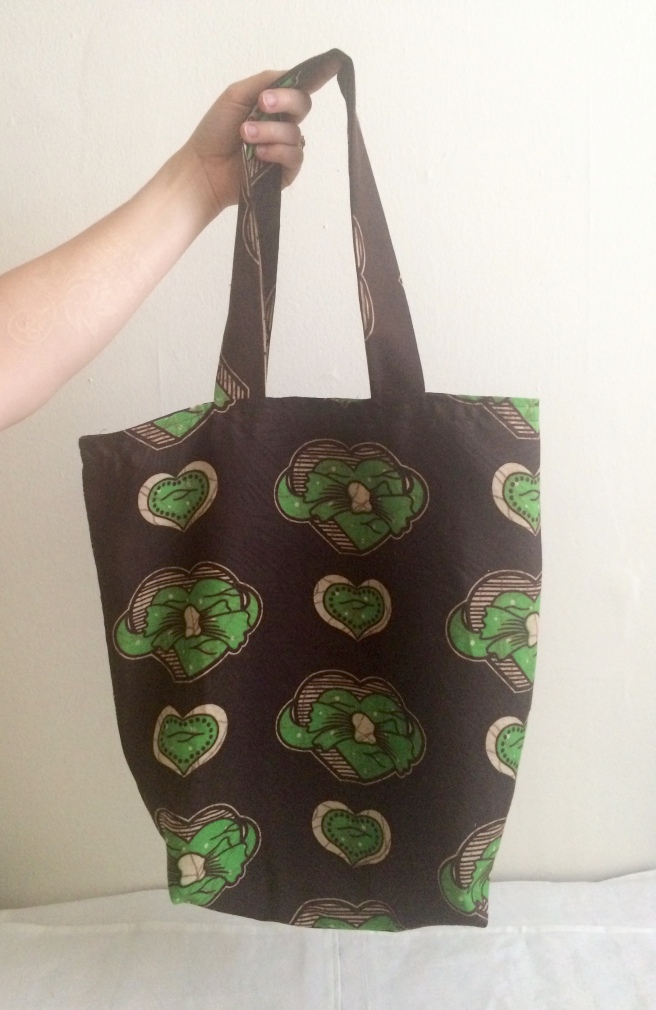
Finished Project: Green Heart Brown Batik Print Tote Bag

Hi friends!

Got another finished project for y’all today. I’ve been on a tote-bag-making streak lately, partly because I’ve been making a bunch for my Etsy site, The Delicate Tension. It’s totes amazing….(I mean, c’mon, how could I let that one just slip by??)

Behold!
Behold!

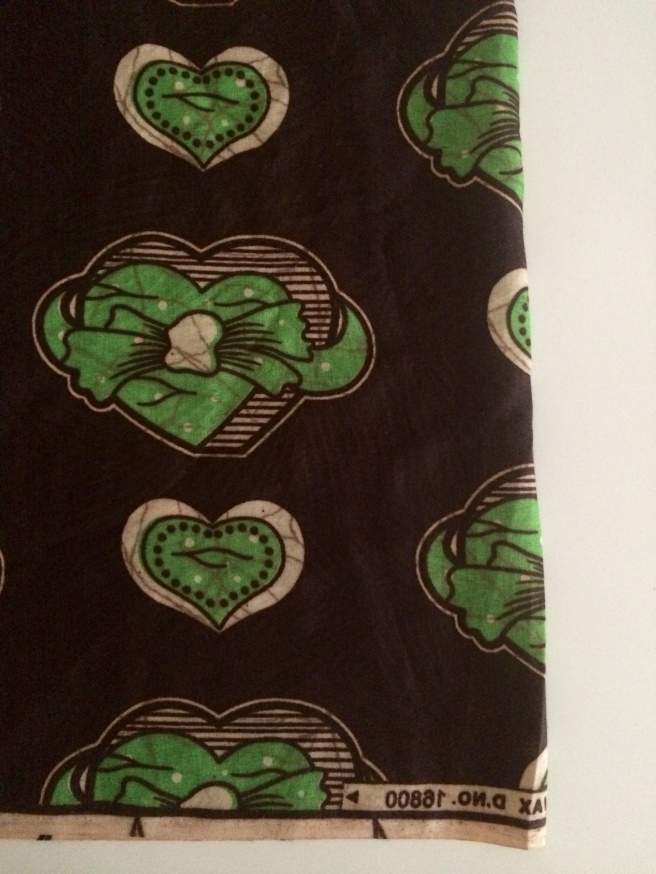
The fabric the tote bag is made from is very special to me. I bought it almost ten years ago when I spent three months in Monrovia, Liberia in West Africa. Working on a hospital ship for three months was a profound and beautiful experience for me, and dramatically increased the worldview of my 19 year-old self. See pictures below:

Ahh, sweet memories. Anyways, the fabric I bought was from a local market and I had a purse made out of it. I had tons leftover, and I’ve kept the rest of it for years, waiting to figure out what to do with it. I finally decided that reusable market bags would be just the thing 🙂

These bags are pretty simple to make, so I’ll give you a quick overview if you’ve got a sewing machine, some ambition, and want to make reusable shopping or tote bags for grocery shopping, beach adventures or whatever tickles your fancy. These measurements are flexible, and if you want a bigger or smaller bag, you can definitely make your way ;-). I fully lined this bag for a little extra hold, but you certainly don’t have to do that if you want to save on time. And now, on to the bag!

First, I folded my fabric in half and cut a piece that was 16 inches in length and 19 inches in height:


Le fold
Le fold

Then, I used my serger to serge two of the open edges together, leaving the third open. If you don’t have a serger, a French seam would be a great alternative. There’s a great tutorial here.


This machine makes me soo happy. 

Then, I pinched out the bottom two corners until they formed a triangle. I then serged across those triangles to create a boxy shape for the bottom of the bag:


I tried to line up my seams to keep it as even as possible. 

I did this a second time to create a lining for the bag from the same fabric. Next I cut two strips 23 inches long by 4 inches wide for the straps. I serged each strip wrong sides together, and then flipped them inside out to hide the seams, and press the straps flat:


Here’s the slightly tricky part: Leave the outer fabric inside out but turn the lining fabric right sides out. Put the lining down inside the outer bag. Insert the strips in between the two layers of fabric, pin, and stitch almost all the way around, leaving a three inch opening:


Once you’ve sewed the edges, leaving a small opening, remove the pins and flip both pieces of fabric inside out. Push the inner lining into the outer fabric. Press the seam line nice and flat, then topstitch (stitch very close to the edge of the fabric) all the way around the top of the bag. This will close the opening that you used to turn the bag. I topstitched twice around because I like the way it looks. Then, voila! A new bag all ready to go:


Ta-da!
Ta-da!

If you don’t have a sewing machine, I have a few more bags like this with some pizzazz in my Etsy shop, but more on that project soon. If you’re still reading, thanks for hanging on with me! Have a wonderful holiday weekend, friends!

Finished Project: White and Peach Lace Watson Bra

Hey there! 

It’s been a while! I hope you’re doin’ well and alright. As for me, there are exciting changes coming down the pipeline, but for now – I give you my second Watson Bra, made with materials from the lovely TailorMadeShoppe:

I’ve gotten the hang of this pattern after several tries, and it is definitely a TNT (tried ‘n true) pattern for me. So comfortable, and it makes me feel like a real grown up to be wearin’ such pretty undergarments. 


This was the first time I left the scalloped lace edging on the cups, and I WILL do that again. Adds a delicate, lovely touch. If you’ve been wondering about whether making a bra is too complicated, I promise it’s not. 


Just a quick post today, but I hope you enjoyed it! Have a great weekend, friends!


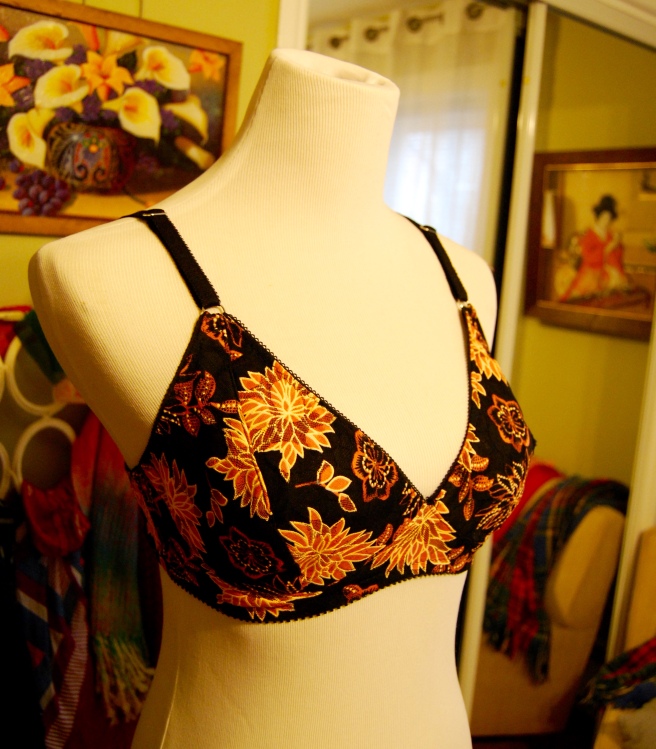
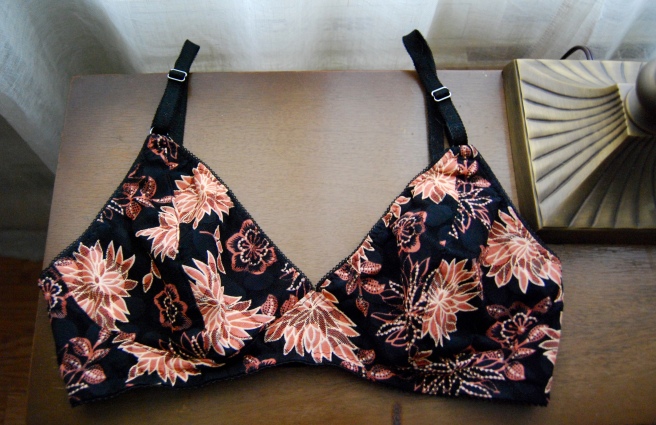
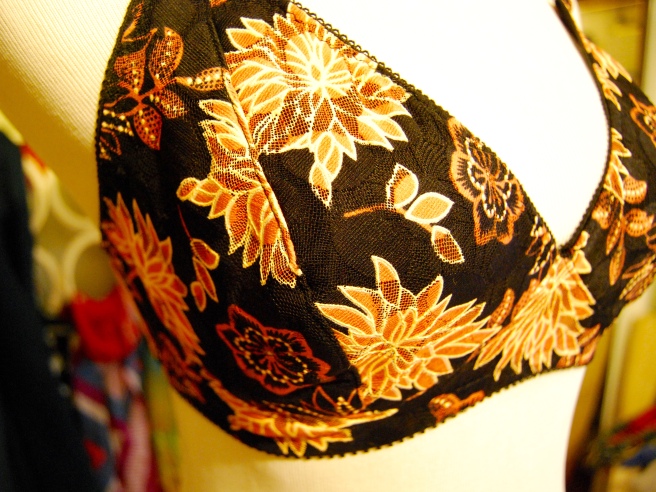
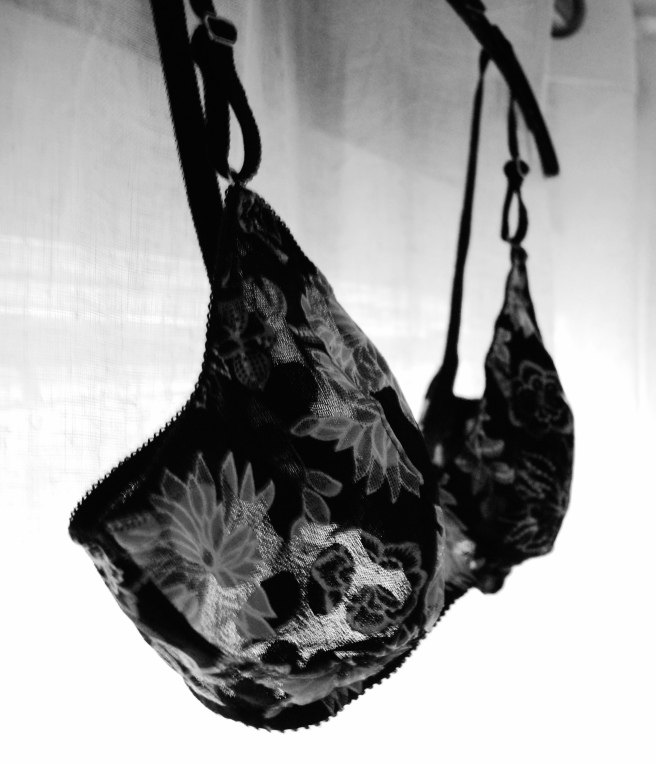
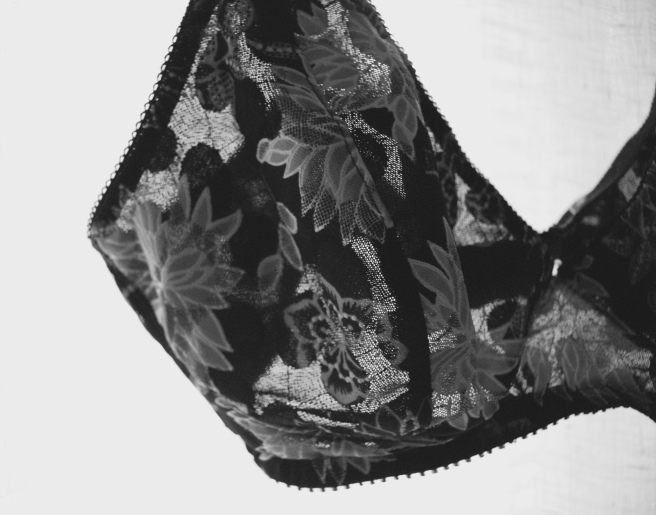
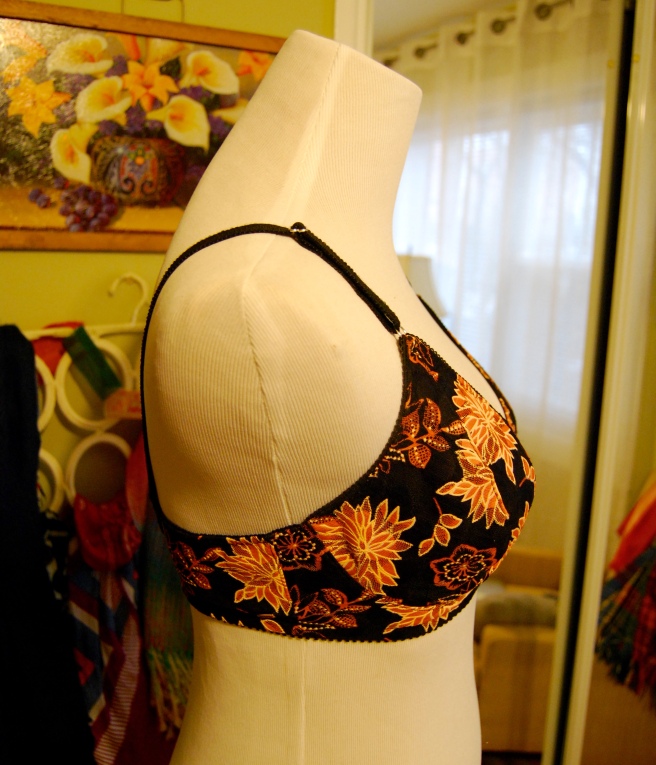
Finished project: Black and Orange Lace Watson Bra

Dun dun duhhh!!!
Dun dun duhhh!!!

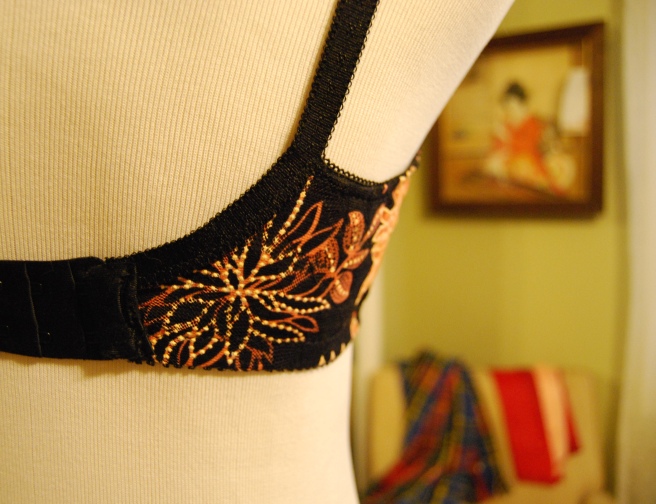
Y’all, it’s happened. This is one of those projects that seemed like a dream, far-off and unattainable, beyond the reach of my nervous little fingers. But behold!

Black Orange Lace Watson Bra

I have actually made a bra!! And by the time this post goes live, there will likely be more in the works!! So excited!! More exclamation points!!!

Black Orange Lace Watson Bra

Seriously, it feels like the most of the internet sewing community have not only tackled the task of bra and lingerie making in the last few years, but perfected it. And as is my custom with being perfectly on trend, current, and hip (insert laughter here) I have finally summoned up the courage decided to give bra-making a go.

I chose the Watson Bra to start off with for several reasons: First, there are soooo many pretty and inspiring versions around the internet. A quick Google search will pull up hundreds of images. Second, it’s designed for beginner bra makers who want to be up to the task but need somewhere simple to start. Cloth Habit, the blog/designer behind the pattern, has an amazingly helpful step-by-step tutorial here. Third, there are no underwires so it’s relatively quick and painless to sew.

Black Orange Lace Watson Bra

Black Orange Lace Watson Bra

The test version I made was definitely too big. I followed the sizing chart included in the pattern, but that’s why we make a test version, amirite? The band was too loose and the cups were too big, so that the bra basically rode up to my chin throughout the course of the day. So for the second (and fingers-crossed wearable) version, I went down two sizes and was extremely careful in sewing my seam allowances. And it turned out beautifully! The fit is comfortable yet secure, and I absolutely adore the fabric. There are a number of Etsy shops that sell “bra kits” – all the findings and fabric you need to make a bra. I bought this kit from TailorMadeShoppe, since I absolutely was not about to go finding all these…..ahem……findings myself. Not for the first real bra, people. No way.

Black Orange Lace Watson Bra

Black Orange Lace Watson Bra

Bonus points because I know that this bra was ethically made (I promise I gave myself lots of breaks whilst making it, and plenty of encouragement in the form of tea and dark chocolate) and fits me perfectly. It’s difficult to find ethically sourced fabric, especially bra and lingerie materials, but I figure at least making it myself is better than buying one that was questionably made.

Overall, I’m so happy with how this turned out and cannot wait to start on the next one. Hope you all have a great week, friends!


Fun in the Florida Sunshine + End of Year Thoughts

Hi friends!

So, I’m just gonna say this up front: I’m sorry I’ve been MIA for the past few months. Life with all it’s ups and downs took over for a while, and I didn’t have much time to sleep, let alone sew and update the blog. But I did want to get one last post in before the end of 2015 – a few photos of a family vacation in Florida over Christmas. It was the first time in years that I’ve seen both sides of my family in the same holiday, which made for an incredibly special and rare holiday season. Looking back over the past year, I’m so thankful for the new relationships and incredible opportunities that have come my way, including the unexpected support for this blog. Thank you so much to everyone who has took the time to read a post or leave a comment. It encourages me more than I can express.

I’m really excited to see how both this blog and my creative journey unfold in the 2016. Growing up in the Midwest, it struck me as important from a young age that our calendar year began and ended in the winter – a slow, thoughtful season. It encourages me to enter each year with purpose, and reflect on the past year with gratefulness. To relearn the art of meditating on one thing for a while, instead of trying to do *literally* all the things I can squeeze into a day.

I hope that whatever this past year held, and whatever the next one holds for you friend, that you experience some joy, some peace, some goodness that brings light into your life. Thank you for being a part of my journey, as I am honored to share some small part in yours.

Annnnndd, enough with the sentimental already! See you in 2016!

Christmas in Florida

We all got socks for Christmas!
A family safari to the beach!
I absolutely love sunsets

Florida sunshine

IMG_3161

IMG_3162

Lights will guide you home

It’s a Joy-ful Halloween: My Recycled Halloween Costume


Sustainable fashion in costume form!

Hi friends!

Happy day-after-Halloween! I hope you all had a safe and fun day, and partied late into the night. I love so many things about Halloween – the candy, the parties with friends, the candy, Halloween movies, the candy (ahem)…..However I especially love the fact that it’s socially acceptable to wear full out, ridiculous costumes in public for one night. I think I saw a giraffe, Poison Ivy, and Marty McFly walking down the street together last night while a vampire flew past on a skateboard. Pure magic.

Halloween is also one of the worst days for sustainable fashion. The dropping prices of clothing, and specifically, Halloween costumes, means that more people are spending money on cheaply made costumes that will be worn for one night and then thrown away. And that process will be repeated year in and year out. This year, the UK is expected to spend £157 million on costumes, while the US is projected to spend close to $2.6 billion. And most of that revenue will eventually end up somewhere like this:

Clothing landfill
Photo from Fashion with a Mission.

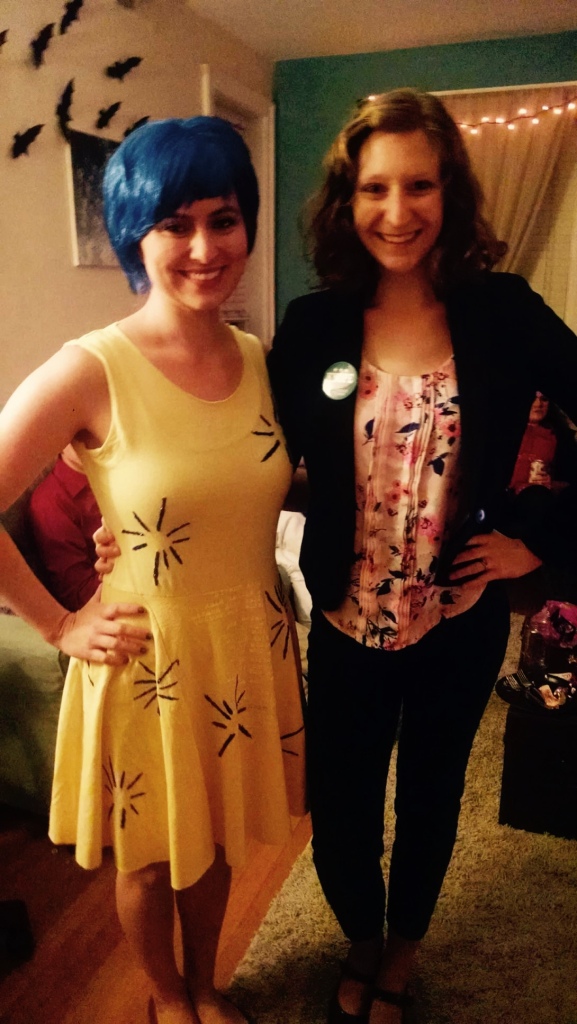
So in light of all that, I wanted a costume that I could make from thrift store items and still expressed my creativity. I decided on Joy from Inside Out because (a) that movie made me sob unashamedly in a movie theater and (b) Amy Poehler is my spirit animal. Plus, Joy is so cute and fun!

Joy from Inside Out Costume
So cute!

I found an amazing tutorial from coolirpa on Youtube for making Joy’s dress from T-shirts she found at the thrift store. Check it out here! It was a pretty easy make. First, you cut off the arms and neckline of a T-shirt, fit it to your sides and cut it at the waist. Then, cut the arms and neckline off the other shirts, sew them together to create a long piece of fabric, and cut out a 3/4 circle skirt based on your body measurements. Sew those pieces together and attach it to the bodice. The video explains it all really well. At that point you have something like this:

Ta-da!
Ta-da!

At which point you are ready to start adding the starbursts on Joy’s dress. I used puffy paint and glitter, which means that my floor is now covered in glitter and will be for all eternity. Because glitter is like a bad guest – it just won’t leave.

The Addams Family and costuming = bliss.

I used a bobbin as a reference point for the starbursts and drew them freehand. Below is the front side waiting to dry:

Le front!
Le front!

After you let the front dry and do the same process on the back, you have a finished costume!

My Joy pose
My Joy pose
With several other party goers.
There was a Leslie Knope too!

So there you have it – a costume for Halloween that is sustainable and fun. Have an amazing Sunday friends!

Finished: Self-Drafted White Cotton Voile Blouse

Oh, heyyy!
Oh, heyyy!

Hey friends!

Sorry for my absence in the past few weeks. Right after the last post – BOOM! Work exploded. Not literally. That would be crazy. But there was just, like SO MUCH TO DO. It was insane.

Thankfully, the amount of work has slightly decreased, and I can see cleeaarrly now the RAIN is gone (please feel free to sing that song with me, out loud or in your head). So I finally have time for another blog post!

Which brings me to today’s short and sweet, easy number:

White Cotton Voile Blouse

White Cotton Voile Blouse

This is a suuuuuper simple top that I made from a gorgeous cotton voile from Mood linked here (seriously, I can’t say no to their stuff). It’s somewhat see-through, so I lined it with a silver lining fabric I’ve had in my stash for ages.

I wanted a simple, Kimono sleeve top that was loose, breezy, and QUICK. There’s nothing quite like drafting, cutting, constructing, and finishing a top in one evening. To acquire this self-drafted pattern (which I’ve reused several times now – if it ain’t broke, don’t fix it amirite?) I laid two shirts that I wanted to combine on the floor over some wax paper and traced, because why not?

My "Why not?" face
My “Why not?” face

This top is so simple I won’t even take any inside construction photos. Partly because it really doesn’t need them (seriously, it’s like two straight lines and that’s it) and partly because the neckline and sleeves are cut with pinking shears, turned under and stitched. Not my prettiest construction, but it gets the job done and I don’t mind it.

White Cotton Voile Blouse

White Cotton Voile Blouse

So there you have it! One of my easiest projects to date and I’ve loved wearing it this summer. Now to begin fall project planning! Do you have anything you’re just itching to make for fall/winter?